Saturday, December 31, 2011

Plus an hour ...

You didn't think that I would let 2011 go out without a recipe did you? I am totally sneaking this in so I have to make it quick but there was no way I was going to let this year go by without sharing this with you. And what else could I possibly do but leave you with a real, honest to goodness Panatone recipe.


That takes a week to make. Plus an hour.

What?!


It's a big recipe. It requires time and love. It is totally traditional and completely amazing. Just like I hope your new year is going to be.


Time to dish.


Insanely time consuming completely amazing Panatone
(Cuccina Italiana) 

**So the gist of it is this: You make a cool starter, which takes a week to develop, and there is some lengthy leavening, and then, there is Panatone heaven.**

Here is what you need for the starter:


  • 2-2.5 cups of unbleached all purpose flour (measured out in 1/2 cup portions)
  • 2-2.5 cups of whole wheat flour (measured as above)
  • 3-3.5 cups of room temperature water (measured out in 3/4 cup portions)

Here is what you need for the Poolish (Pre-Ferment):

  • 1/4 cup of unbleached all purpose flour
  • 1/4 cup plus 2 tablespoons of room temperature water
  • 1/4 teaspoon plus 1/8 teaspoon of active dry yeast

Here is what you need for the dough:

  • 3 and 3/4 cups of unbleached all purpose flour (more if needed)
  • 1/2 a cup of sugar
  • 1 tablespoon plus 1 and 1/2 teaspoons of fine sea salt
  • 2 and 1/2 teaspoons of active dry yeast
  • 3 large eggs
  • 6 large egg yolks
  • 1/4 cup plus 2 tablespoons of whole milk (no skimping here with less fat okay...)
  • 1 and 1/4 cups of currants, soaked in warm water (or warm rum) for 10 minutes and then drained
  • 6 ounces of candied orange peel cut into small dice
  • 2 and a 1/2 tablespoons of honey
  • 3 tablespoons of quality extra virgin olive oil
  • Finely grated zest of three lemons and three oranges
  • 1 vanilla bean split lengthwise, scraped and reserved
  • 14 tablespoons of cold, unsalted butter

Phfeww! Are you guys still with me? Okay, here we go.

Here is what to do for the starter:

  1. One week before your Panatone dough adventure starts, get a bowl out and mix the following: 1.5 cups each of the all purpose and whole wheat flours and add 3/4 cups of the water. Stir into a batter like mix. Then cover with a cheesecloth and leave it alone for three days. Yep. Three. You will smell it baby!
  2. Now, uncover, stir together, and throw out half the mixture. This is the beginning of your started dears..Now add again as above 1.5 cups of each of the flours and 3/4 cups of the water, give a stir, cover and leave it for two days.
  3. At this point repeat the "feeding" process (same quantities of everything) and leave it for another 1-2 days until the starter is "ripe". It will bubble and smell sweet and lactic, kind of like yogurt, and a small spoonful will float in water.

Here is what to do for the Poolish (night before baking the Panatone):

  1. Get another bowl and mix the flour, water and yeast and let stand at room temperature for 10-12 hours.

Here is what to do for the dough:

  1. Yet another bowl must come out. Preferably one of an electric mixer or your hands will be really tired...Once out, blend together flour, sugar, salt and yeast. In another bowl, combine 3/4 cups of starter, all of the poolish, whole eggs, egg yolks, and milk.
  2. With your mixer on low, slowly add wet ingredients to dry ingredients and mix until everything belongs together. About five minutes ...Let the dough rest for about 20 minutes...
  3. Now, in another large bowl(have you kept count of how many we are at here?) mix together currants, candied orange peels, honey, oil, lemon and orange zests, and vanilla and put it aside.
  4. Butter time! Cut the butter into medium pieces, put between two pieces of saran wrap, then flatten out. Return flattened butter to fridge. Come on now! Breathe! You can do it!
  5. Mix the rest of the dough on medium speed for 6-8 minutes. With the mixer running, add the butter piece by piece until all is incorporated and the dough is smooth.
  6. Then take the bowl out of the mixer, using your hands now, add the currant mixture to the dough to incorporate completely, then take dough and put it in a huge bowl, cover and let rise for two hours.
  7. Turn dough once, then cover and let rise again for about another 2 hours.

It's time to bake!!! Haleluiah!!!

  1. Coat your Panatone molds with butter and put molds on a baking sheet. Decide your kick ass dough into rounds and place in molds about half way. Let the dough rise until it reaches the height of the papers, about 1-2 hours..I swear, we will bake it...
  2. Heat the oven to 400 with rack in the middle and bake! For about 15-17 minutes. Keep an eye on it, you'll know ...

Then dear readers, take it out, let it cool, and enjoy something from a time gone by.

Love and happy 2012,

Oana

Wednesday, December 28, 2011

What I learned ...

Well, here it is. Three days to go until the New Year. A stack of late Christmas cards on my table. Patiently and knowingly (always late) waiting to be filled and mailed... Me, sitting in the kitchen being distracted by nightfall, snow and the blue lights outside ... reflecting (instead of getting to said cards) ... What a year it has been dear readers. Really. If I had to describe it in one word, that word would be scary. It is not a fancy word, but it is a word filled with truth.

Cards ...they so know they are going to be late ...

Distractions ...


This year has been a year filled with change and growth for me dear readers. Mostly in heart and spirit. Mostly because I had no choice. I've had to face many challenges and many fears. To look at life, people, relationships and myself in a light that I had never known before. And I had all the time in the world, in which to do it. My sabbatical is nothing like I thought it would be. I guess I kind of had an inkling of an idea that giving myself so much time on my hands after not having any for ..oh ..I don't know ..ever ..would have some kind of reflective, existential consequences but boy was I not prepared for the sheer physical and mental mind-bend of it all.

I'm going to share what I learned...it's personal, a little all over the place if you don't mind, and another scary thing to add to the proverbial list ...

This year dear readers, I learned to slow down. To take better care of my body because it is the only one I have and it feels really really good when I do. That I need to move. To sweat. To have screaming, kid like, heart pounding fun. I learned that I am very uncomfortable (like panic inducing uncomfortable) not having control and structure in work. I learned why. And to let that go a little more every day. I learned to be vulnerable. I learned to accept some of the not so pleasant parts of myself (yes, I have some :) because they are part of who I am. To soften up a little. To judge less. To be there for myself. I learned that I need to pay more attention to nature and light and cycles because they are a part of me and influence my well being tremendously. That I love rituals and marking the changes of time. I learned to talk about myself and that I would not burst into flames or die of shame if I did. That I cannot help sometimes no matter how hard I try. I learned that I cannot fix everything and that's okay. That I don't always have to be nice. That it is okay to be tired.

I learned to be okay with being scared, uncertain, in limbo and without a clear path for the moment, and to move forward anyway. I learned that everything I think I know (even the sealed in stone huge stuff) can change at any moment. And, that the human capacity for transformation and growth is a marvel.

Now, on to my dried flowers and other such things. I know I know, a little abrupt, but hey, a girl can only take so much heart on sleeve very public soul bearing. So, what I also wanted to share with you are some little things that put a smile on my face and remind me that things will be warm, bright and green again soon.

Time to dish ...in photos ...

Flowers in jars on counter tops ..
Braided garlic and fuschia  flowers hanging on ancient sandwich press ...
Dried flowers ...
Red berries on dark branches ...

Wreaths made out of grapevines with dried grapes still hanging on them ...

Big, beautiful, regular wreaths ...


Happy New Year dear readers. As old fashioned as it sounds, may all your dreams come true.

Wednesday, November 23, 2011

People will bow down ...

To get straight to the point, I am not a baker.

So. Not. A. Baker.

Proof: **I literally freaked out when shopping for this recipe and standing in the butter area I literally had to look five times at my phone because I was completely incredulous (I actually gasped) that these two, teeny, tiny cookie recipes could use that much butter. And the worst part was, as I left it hit me, I needed more butter, I had to double the recipes. It was nuts. And don't even get me started on the glucose and corn syrup ...Oh, and then when I realized I had to wait ... for the butter..room temperature butter...**.

Butter people ...so much butter ...

Back to story: I must say that I have always wanted to be a baker, to bake that is, but frankly, it scares me. The sheer preciseness of it all scares me. I naturally lean toward sublime chaos in the kitchen. The kind where you let your inspiration take you wherever it wants to that day. No holds barred. Aprons be donned it's going to get messy! You get the point. I am afraid of a whole cooking world that is so measured. So precise. So linear. So full of calories. Over the years, in attempts to gently nudge myself in the baking direction, I have bought baking related items, been given them as gifts and one by one, their fate awaited them. They were to live a lonely life under the kitchen sink (which I do not have at the moment). After some time went by, as it does, I would inevitably, and guiltily, pry open the door, look at them abandoned under the sink (I mostly, and guiltily, avoided their stares each time I opened the cupboards) and feel bad. For an object. I realize. Said bad feeling caused me to then head immediately for nearest charity to give sad unused baking items away... only to need them exactly one day after I had given them away because that was the day I needed to bake! Naturally.

This time though dear readers, it's really happening. I really need to bake (there's my friend's bazaar you see...) and I just gave away my kitchen aid super baking bowlmixercontraption thingie about two weeks ago and now I need it. I need it because I am baking some scary chocolate cookies and then some really scary chantrelle cookies. But I don't have it so my bare hands it is. And, I am doing it at the perfect time for someone with no baking tools and a baking phobia. The time during which I have no sink, no running water, a half finished countertop and no dishwasher (due to no running water). Because in my world, dear readers, when one is renovating a kitchen and has no sink, no running water, a half finished countertop and no dishwasher (due to no running water), it's time to bake 6 dozen cookies!

Anyhow, I could not make the scary chocolate cookies yet because it was just too much to bake both in said kitchenless kitchen (especially because it's a crazy recipe from Christina and requires advanced techniques perfect for the novice baker such as myself ...yes ...) so I made the ridiculous Chantrelle mushroom cookies I had a recipe for from an artisinal mushroom drier I met at this launch. And to make a flour filled, buttered out, nail-biting long story short, they are awesome. The bomb. I don't want you to be afraid of them because you will miss out on their awesomeness. Make them and people will bow down to your awesome cookie. Okay, too much sugar.

Time to dish.

The Bomb Chantrelle Butter Cookies


Here is what you need:


  • 2 and a half cups of flour
  • 1/2 a cup of gorgeous ground dried Chantrelles (grind in your spice or coffee grinder) they smell like heaven...I'm just saying ...
  • 1 and a quarter cups of butter room temperature, nerve wracking wait ...I'm just saying ...
  • 2/3rds of a cup of granulated sugar
  • 1/2 a tablespoon of beautiful vanilla extract


Here is what to do:


  1. Sift your flour, grind your mushrooms, then combine.
  2. Wait for the butter to come to room temperature ...wait ...wait ...
  3. Then mix together with the sugar and vanilla extract until a smooth yummy paste. Once you've done that and your arms hurt, mix in the dry mixture and combine until you have a super cool cookie dough. Then form into balls, squash a little and bake in a pre-heated 350 degree oven for 12 minutes. Put a timer on. I learned. Then try not to eat ten of them at the same time. I learned.


Wednesday, November 9, 2011

Once I looked down ...

Hurray! A free morning! In between things! Yeesh. It's been pretty crazy around here the for last couple of weeks dear readers. An unending rushing stream of meetings, out of town visitors (aka Dad, I know he's singular...but it felt plural), dinner parties (Kosher lamb leg sword fight dinner parties with peer pressure fist pumping chant's of "Do it for the blog!" - excellent excuse for grown people to pick up giant lamb leg, bite into it growling and holding it up in victory...yes, you read right, I'll tell you about it), planning dinner parties, shopping for dinner parties, balancing, being at the market three days a week, property buying adventures, launching dish. private cooking lessons and catering to boutique dinner parties (so. much. fun.), shucking bags of beans, making mini lamb meatball and zucchini leaf soup, stuffing peppers, roasting peppers, drying peppers (see Facebook profile pepper rant), peeling thousands of gooseberries, buying lots of wool things (blankets, skins, socks and other such things) preparing our home for Fall and Winter, picking pumpkins and this awesome event.

Which is what I want to tell you about today. The thing though is this... the evening took a slight...shall we say... twist. Between the location, the people, the food and the event itself, somewhere along the line, my obsessions got the best of me. Quelle surprise right? So there I was, in the middle of it all. With my media badge. The sun, the water, the boats, the cookies, the truffles, the over seven hundred plus (neuroses exposing) people, the chefs preparing for burger battle, the food critics preparing their burger palates and insane badass criteria lists ...I was preparing my strategy for photos, wondering how I was going to eat everything (the burgers were seriously huge), proudly and gleefully admiring the Birri boxes (which I see all day at the market) which were the staple for the chefs burger garnishes and generally scoping out the scene...when I saw this:


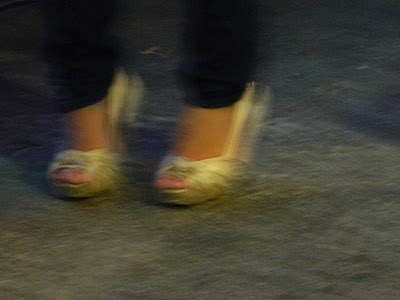
It was innocent. I thought nothing of it, (except oh! how cool!) snapped a pic, and went on my merry way, stall to stall, tasting all the awesome concoctions these awesome chefs had, well, concocted, if you will. I had boudin and dark chocolate burger (team GDS! awesome idea, I told you there would be blood...), I snapped a pic. I had a foie gras burger, I snapped a pic. I had a chicken fried chili burger, I snapped a pic. I had a pulled pork and fig burger, I snapped a pic.  But a little secret here ...the pics were all of shoes! Of shoes for heaven's sake. You should have seen me, burger in hand taking a bite, mmm'ing and ammm'ing and oh, these are so good'ing and then eeeever so caaaasually my head would just kind of... turn and look down ... at shoes. I simply couldn't help myself. Once I looked down, that was it. For the rest of the night I walked around snapping peoples shoes, while normal people were snapping burgers. Indeed.

Obsessive shoe snapping:


I also got a bunch of really cool shots (between obsession shots of course) of the "other" stuff, you know, the burgers and the people and the actual relevant stuff... Take a look at dish. on flickr my dear readers until I figure out how to construct a photo page on our little blog here. Yours and mine. Feels cool. In the meantime ...

Time to dish.

The most delicate Mini Lamb Meatball and Zucchini Stem Minestrone


** A little note. Zucchini stems are completely awesome. They have this wonderfully unique flavor and they hold up incredibly well during cooking. They don't disintegrate into nothingness and have a beautiful color to boot even after cooking. You don't see them around often and the zucchini stems that were used for this recipe were brought to the market by a little, old, hunched over Italian lady that picks them from the fields. She brings these goodies often in the Fall. Look out for them at your local market or ask your farmers/vendors where you can get them. It is completely worth the effort. **


Here is what you need for the Mini Lamb Meatballs:

  • Ground lovingly farm raised fatty lamb
  • One beautiful egg
  • Small handful of fennel seeds
  • Sea salt
  • Ground pepper
  • Cayenne pepper, small pinch
  • Olive oil
  • Finely chopped parsley
  • Finely chopped fennel fronds (if you have them)

Here is what you need for the rest of the soup:

  • Two bunches of Zucchini stems, chopped about five inches above the starting point of the stem (below that is not tender)
  • Onions, finely chopped
  • Garlic, smashed
  • Water (no broth required because the flavor of the zucchini stem is so amazing)
  • Sea salt
  • Cracked pepper
  • Lemon juice, lots

Here is what to do to make the mini lamb meatballs:

  1. Combine all your beautiful  mini lamb meatball ingredients into a big bowl and then get in there with your hands and mix. That is about it dear readers. Once mixed, roll into mini meatballs. Honestly nothing more to it. As little or as big as you like them. I have to thank loving husband here (thank you Axel) who rolled them for me while I was tending to the chopping. We have been cooking together more often these days and I really like it. He has a lovely touch.
  2. Once rolled, heat grape seed oil in a pan, medium high heat and brown these little suckers. Don't crowd them because you want to get it over with though. You'll steam their beautiful globeness instead of browning them. Once done set aside. 

Here is what to do for the rest of the soup:

  1. In a large soup pot, heat olive oil and add your onions, garlic and sautee for about ten minutes. Then add your chopped zucchini stems. Stir and sautee for another five minutes. Add the rest of your ingredients, your meatballs, cover with cold water and bring to a boil. Then reduce heat and simmer until stems are tender and meatballs are happily cooked. About half an hour'ish. Taste to know for sure. Add a little more lemon juice. Super healthy, so delicious and beautiful for fall and winter. That's it dear readers. See you soon. x